WoW Season of Discovery Hunter Runes Phase 2

WoW Season of Discovery Hunter Runes Phase 2

Welcome to our comprehensive guide to the new Hunter runes introduced in Phase 2 of the Season of Discovery in World of Warcraft. Below, you'll find detailed information, including exact locations, maps, and walkthroughs for all discovered Hunter runes up to Level 40.
Hunter runes are essential elements that enhance your abilities and prowess as a Hunter in World of Warcraft. As you journey through the Season of Discovery, uncovering these runes will greatly augment your gameplay experience.
Runes Phase 2
 Expose Weakness (Belt):
Description: Your melee and ranged criticals increase your attack power by 40% of your current Agility for 7 sec.
Finding the Rune: To acquire the Rune of Expose Weakness, follow these steps diligently:
1. Visit the Badlands: Engage Dustbelcher Ogres in the Badlands until you obtain a Primitive Drawing drop.

2. Initiate the Quest - Terror of the Desert Skies: Upon obtaining the Primitive Drawing, you'll receive the quest Terror of the Desert Skies. Head to Stranglethorn Vale and turn in the quest to Hemet Nesingwary.
3. Capture a Critter: Hemet Nesingwary will provide you with a cage. Return to the Badlands and capture any critter using the cage.
4. Journey to the Southwest: Navigate to the southwestern part of the Badlands (/way 22 67). Locate a large bird's nest in this area.

5. Use the Critter as Bait: Deploy the captured critter as bait to lure down Gharrik, a formidable level 40 bird. Defeat Gharrik in combat.
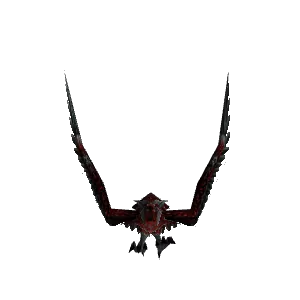
6. Retrieve the Crimson Trophy Quill: Loot the Crimson Trophy Quill that drops from Gharrik's defeated form.
7. Return to Hemet Nesingwary: Head back to Hemet Nesingwary in Stranglethorn Vale and present him with the Crimson Trophy Quill.
8. Claim Your Rune: Hemet Nesingwary will reward you with the coveted Rune of Expose Weakness.
 Melee Specialist:
Description: Raptor Strike cooldown reduced to 3 sec and is now instant, Mongoose Bite cooldown removed, and Raptor Strike has a 30% chance on each attack not to trigger its cooldown.
Melee Specialist Rune Location: Embark on a mystical journey to obtain the coveted Melee Specialist Rune by following these intricate steps:
1. Venture into Deadwind Pass and seek out the Dalaran Agent at Ariden's Camp. Engage in conversation with them to receive Ariden's Sigil.

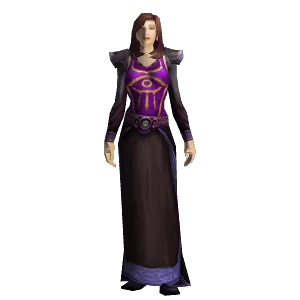
2. Equip Ariden's Sigil and venture forth, or join forces with another player who bears this mystical artifact. With the sigil activated, players must uncover and defeat seven formidable Dark Rider Elites. Activate Ariden's Sigil to Reveal Dark Rider, and the presence of a Dark Rider will be signaled by the acquisition of the Dark Presence buff.
3. Hunt down the Dark Riders in various locations:
- Deadwind Pass: (/way 43 29)

- Duskwood: (/way 23 47)

- Swamp of Sorrows: (/way 69 28).

- Arathi Highlands: (/way 60 40).

- Badlands: (/way 58 54).

- The Barrens: (/way 52 36).

- Desolace: (/way 65 25).

4. Collect the diverse Dalaran Relics dropped by the Dark Riders, including Odd Dalaran Relic, Whirring Dalaran Relic, Heavy Dalaran Relic, Slippery Dalaran Relic, and Creepy Dalaran Relic.
5. Return to the Dalaran Agent with all obtained Dalaran Relics and turn in the respective reward quests:
- ![]() Curious Dalaran Relic
Curious Dalaran Relic
- ![]() Curious Dalaran Relic
Curious Dalaran Relic
- ![]() Curious Dalaran Relic
Curious Dalaran Relic
- ![]() Curious Dalaran Relic
Curious Dalaran Relic
- ![]() Curious Dalaran Relic
Curious Dalaran Relic
- ![]() Curious Dalaran Relic
Curious Dalaran Relic
- ![]() Curious Dalaran Relic
Curious Dalaran Relic
6. Once all seven Dalaran Relics have been surrendered, bask in the glory of your accomplishment as the Melee Specialist Rune is bestowed upon you as the ultimate reward. May the arcane forces guide you on this intricate quest, and may your melee specialist rune with newfound power!

 Steady Shot (Belt):
Requires Ranged WeaponA steady shot that causes 60% ranged weapon damage.
Locating the Steady Shot Rune: The Rune of Steady Shot awaits you in the Arathi Highlands, specifically in the vicinity of Needletooth, a unique fish located in the lake near Witherbark Village. Follow these steps to obtain the Rune:
1. Navigate to Arathi Highlands: Head to the Arathi Highlands, an expansive zone filled with diverse landscapes and challenges.
2. Locate Witherbark Village: Make your way to Witherbark Village within Arathi Highlands. It's a key reference point for your journey.
3. Discover the Lake near Witherbark Village: Seek out the lake near Witherbark Village. The coordinates /way 66 60.5 will guide you to the precise location.

4. Identify Needletooth - The Fish: Keep an eye out for Needletooth, a unique fish residing in the waters of the lake.
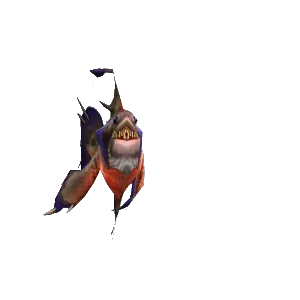
5. Spawn Timer Information: Needletooth has an approximate 60-second spawn timer, so be patient as you await its appearance.
6. No Fishing Pole Required: Notably, you won't need a fishing pole or any fishing equipment to obtain the Rune of Steady Shot. Simply interact with Needletooth once it spawns.
7. Claim the Rune of Steady Shot: Upon interaction with Needletooth, you will acquire the Rune of Steady Shot.
Note: It's crucial to emphasize that Needletooth is not an item you fish up; rather, it's a unique fish entity in the lake.
 Dual Wield Specialization (Boots):
Description: Increases the damage done by your offhand weapon by 50%, causes your Raptor Strike to strike with both weapons when you are dual-wielding, and Raptor Strike deals 30% increased damage when you are wielding two weapons of the same type.
Locating the Dual Wield Specialization Rune: The Rune of the Scrapper is concealed in the dense jungles of Stranglethorn Vale. Follow these steps to claim your mastery over Dual Wield Specialization:
1. Journey to Stranglethorn Vale: Venture into the lush and challenging Stranglethorn Vale, known for its dense jungles and diverse wildlife.
2. Nesingwary Camp Coordinates: Navigate to the coordinates /way 31.8 15.7, situated southwest of the Nesingwary camp. Prepare for the challenges that lie ahead.

3. Trigger the Danger! Buff: As you approach the designated coordinates, you will receive a 'Danger!' buff. Be ready for potential encounters.
4. Use Flare to Reveal Bloodscalp Guerrilla: Activate your Flare ability to reveal the elusive Bloodscalp Guerrilla. Keep in mind that he might not spawn immediately near you; he tends to roam around the area.
5. Engage and Defeat the Bloodscalp Guerrilla: Locate the Bloodscalp Guerrilla and engage in combat. Defeat this formidable foe to secure the area.
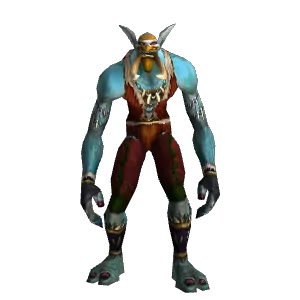
6. Loot the Rune of the Scrapper: After triumphing over the Bloodscalp Guerrilla, loot the Rune of the Scrapper from its remains. This rune holds the key to unlocking Dual Wield Specialization.
Note: The appearance of the Bloodscalp Guerrilla may require some patience, as it roams the area. Stay vigilant, and the rune shall be yours.
 Invigoration (Boots):
Description: When your pet scores a critical hit with a special ability, you instantly regenerate 5% of your maximum mana.
Invigoration Rune Location Guide: Follow these steps to locate and obtain the Rune of Invigoration, which is essential for learning the Invigoration ability:
1. Swamp of Sorrows - Find Amaryllis Webb:
- Head to Swamp of Sorrows and locate Amaryllis Webb at coordinates /way 25.0 54.2.

- Amaryllis Webb sells an Entomology Starter Kit for 50 silver, containing a net and a guide.
2. Stranglethorn Vale - Catch an Arbor Tarantula:
- Travel to the Lake Nazferiti logging camp in Stranglethorn Vale.
- Use the net from the Entomology Starter Kit to catch an Arbor Tarantula located on a tree stump (around /way 45 19).

3. Arathi Highlands - Catch a Hay Weevil:
- Go to the Northfold Manor in Arathi Highlands.
- Use the net to catch a Hay Weevil located in any of the barns or stables (around /way 31 28).

4. Desolace - Catch a Flesh Picker:
- Move to the Kodo Graveyard in Desolace.
- Use the net to catch a Flesh Picker located within the bone graveyard (around /way 51 59).

5. Return to Amaryllis Webb - Claim the Rune:
- Return to Amaryllis Webb in Swamp of Sorrows.
- Present the obtained specimens to Amaryllis Webb, showcasing your bug-hunting prowess.
- Receive the Rune of Invigoration as a reward for completing the scavenger hunt.
Note: Ensure that you have the Entomology Starter Kit with you throughout the scavenger hunt to catch the specified creatures.
 Trap Launcher (Boots):
Description: Your Traps can now be placed at any location within 35 yards, and can be placed while you are in combat. Additionally, your Fire-based and Frost-based traps now have separate shared cooldowns.
Trap Launcher Location Guide: Follow the following steps to get the Rune Trap Trapper.
1. Desolace Quest Start: Begin your adventure by obtaining the "![]() Highway Robbery" quest in Desolace. Locate an Extinguished Campfire northwest of the Kodo Graveyard at coordinates /way 47 54.
Highway Robbery" quest in Desolace. Locate an Extinguished Campfire northwest of the Kodo Graveyard at coordinates /way 47 54.

2. Desolace - On the Lam: Head to /way 63 39 near Kormek's Hut in Desolace. Turn in the "![]() Highway Robbery" quest to Bibbly F'utzbuckle and pick up the quest "
Highway Robbery" quest to Bibbly F'utzbuckle and pick up the quest "![]() On the Lam."
On the Lam."

3. Booty Bay - Cherry for Your Thoughts?: Journey to Booty Bay and visit the inn. Turn in "![]() On the Lam" to Tokal and acquire the quest "
On the Lam" to Tokal and acquire the quest "![]() Cherry for Your Thoughts?". Purchase Cherry Grog for the next part of your quest, "
Cherry for Your Thoughts?". Purchase Cherry Grog for the next part of your quest, "![]() No Honor Among Thieves."
No Honor Among Thieves."

4. Arathi Highlands Bridge: Seek out a rowboat located under the bridge between Arathi Highlands and the Wetlands, approximately at /way 53 91 on the Arathi Highlands map. Interact with the boat to teleport to the eastern shore.

5. Confront Illari Duskfeather: Locate Illari Duskfeather and engage in conversation. For most races, two equally hostile dialogue options will be presented. Choose one to initiate combat with Illari. Defeat her, collect the dropped bag, and loot Illari's Key.
6. Unlock the Treasure: Utilize Illari's Key to unlock the Jewel-Encrusted Box. Open the box and claim your well-earned Rune.
Note: Night Elves have a peaceful dialogue solution available, and if chosen, Illari will provide them with Illari's Key for the Jewel-Encrusted Box. May the arcane winds guide you through this intricate quest, and may the Trap Launcher Rune enhance your magical prowess!
