

 5 MYSTERY GIFTS

![[WoW] Protection Paladin guide](https://d3p9x0g8yuku7f.cloudfront.net/media/thumbnails/thumbnails/ProtPala.jpg.800x480_q90_detail_format-WEBP.webp)
WoW Classic Protection Paladin Guide
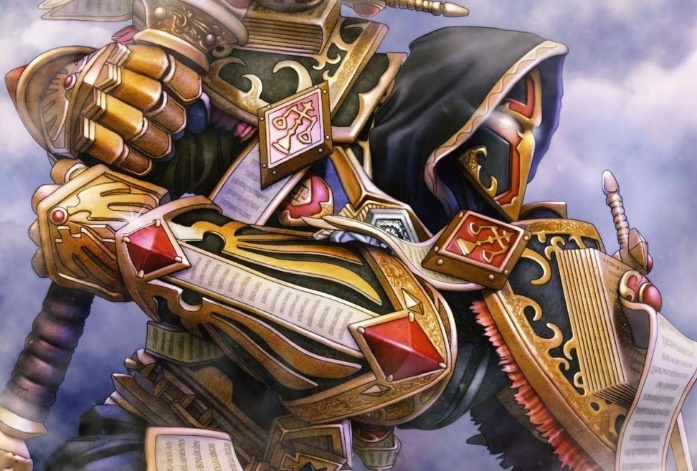
If we move back to history, the only functioning tanks in Vanilla were Protection Warriors and Feral Druid's kind of served in a similar manner. However, in the case of Protection Paladins, their tanking abilities were quite limited, but thanks to The Burning Crusade, this race gained more abilities and tools, allowing them to perform remarkably during raid encounters. Then again, they cannot replace the Warrior Tanks, but they did finally obtain the necessary tools required to compete with them, and who knows they might reach greater statures in the near future.
Primary Abilities
Protection Paladins have the ability to use; Righteous Fury, which provides a bonus to their threat and enables the aggro maintenance. Consecration, which is the main AoE thread ability that uses Rank 5 during the pull and then moves down to Rank 1 to avoid unnecessary mana consumption. Holy Shield, which is also a good source of thread and uses Rank 1 to save mana. Seal of Wisdom or Judgement of Wisdom, which are both powerful abilities to regenerate mana, and with a weapon speed of under 2.00, maintaining 100-175 MP5 is quite easy during an ongoing battle. Seal of Righteousness, which is a threat ability, is primarily used on single targets during a raid, and you can use Judgement to boost it up. Greater Blessing of Kings, which is similar to Seal of Righteousness and scales well with the number of players buffed and Righteous Fury.
Apart from these, there are also other useful spells and abilities that can be used while playing as a Protection Paladin; Seal of the Crusader, Judgement, Greater Blessing of Wisdom, Retribution Aura, and Holy Wrath Exorcism for Offensive gameplay. Devotion Aura, Greater Blessing of Sanctuary, and Divine Shield for Defensive gameplay. Blessing of Protection and Hammer of Justice for Utilities.
Talent Builds

There isn’t any targeted best talent build for Protection Paladins, but where are builds that be added onto your custom build to enhance the gameplay. Let’s have a look at the four available options that you can choose from:
Max Mitigation Talent Build: This build was carefully strategized and developed for those players who want to put their entire focus on taking. Holy/Protection Hybrid Talent Build: This build is also known as the Jack of All Trades because it allows you to flexibly switch between the healing and off-tanking roles during a raid. Balanced Talent Build: This is the modified version of Max Mitigation Talent Build, where some mitigation talents have been removed. A balanced build is basically recommended for players who have good tanking gear and can compensate for the lack of defence and armour bonus from Anticipation and Devotion Aura, respectively. Solo AoE Farming Talent Build: As the name suggests, the intention behind strategizing this build was to maximize the endurance against mods during solo farming in a normal dungeon or in the open world.
Recommended Gears
Main Hand
Phase 1: Dimensional Blade, Flurry Axe, Aurastone Hammer, Arbiter’s Blade, Axe of Rin’ji, and Mirah’s Song. Phase 2: Hedgecutter and Mastersmith's Hammer. Phase 3: Thunderfury – Blessed Blade of the Windseeker, Lok’amir Il Romanthis, and Blackguard. Phase 4: Bloodlord’s Defender, Bloodcaller, Fiery Retributer, and Renataki’s Soul Conduit. Phase 5: Stinger of Ayamiss, Sageblade, Runesword of the Red, Sharpened Silithid Femur. Phase 6: The end of Dreams.
Shield
Phase 1: Draconian Deflector, Argent Defender, Troll Protector, Force Reactive Disk, Drillborer Disk, Malistar's Defender. Phase 2: Barrier Shield - Dire Maul North. Phase 3: Elementium Reinforced Bulwark. Phase 4: Aegis of the Blood God. Phase 5: Draconian Aegis of the Legion, Buru's Skull Fragment, Blessed Qiraji Bulwark. Phase 6: The Face of Death, The Plague Bearer.
Head
Phase 1: Judgement Crown - Onyxia, Gyth's Skull, Golem Skull Helm, Helm of Awareness. Phase 2: Enchanted Thorium Helm, Helm of Awareness. Phase 3: Helm of Endless Rage. Phase 4: Southsea Head Bucket. Phase 5: Avenger's Crown, Helm of Domination, Soulforge Helm.
Legs
Phase 1: Judgement Legplates, Deathbone Legguards, Legplates of the Eternal Guardian, and Bejeweled Legguards. Phase 2: Enchanted Thorium Leggings. Phase 3: Legguards of the Fallen Crusader. Phase 4: Bloodsoaked Legplates. Phase 5: Avenger’s Legguards, Legplates of Vigilance, and Soulforge Legplates.
Shoulder
Phase 1: Stockade Pauldrons, Stoneform Shoulders, Wailing Nightbane Pauldrons, and Earthslag Shoulders. Phase 2: Bulky Iron Spaulders and Bile-etched Spaulders. Phase 3: Drake Talon Pauldrons and Judgement Spaulders. Phase 5: Pauldrons of the Unrelenting, Avenger’s Pauldrons, Polished Obsidian Pauldrons, and Soulforge Pauldrons.
Chest
Phase 1: Deathbone Chestplate, Ornate Adamantium Breastplate, Plate of the Shaman King, Spiderfang Carapace, Demon Forged Breastplate and Warrior's Embrace. Phase 2: Enchanted Thorium Breastplate and Kromcrush’s Chestplate. Phase 3: Judgement Breastplate. Phase 5: Avenger’s Breastplate and Soulforge Breastplate.
Hands
Phase 1: Deathbone Gauntlets, Stonegrip Gauntlets, Boneclenched Gauntlets. Phase 2: Force Imbued Gauntlets. Phase 3: Judgement Gauntlets. Phase 4: Bloodsoaked Gauntlets, Darkrune Gauntlets. Phase 5: Gauntlets of Steadfast Determination, Gauntlets of the Immovable, Soulforge Gauntlets.
Wrists
Phase 1: Lawbringer Bracers, Wristguards of True Flight, Vigorsteel Vambraces, Lightforge Bracers, Bracers of Valor. Phase 2: Fel Hardened Bracers. Phase 3: Judgement Bindings. Phase 4: Dragonbone Wristguards. Phase 5: Soulforge Bracers.
Feet
Phase 1: Core Forged Greaves, Deathbone Sabatons, Boots of Avoidance, Shalehusk Boots, Master Cannoneer Boots. Phase 3: Judgement Sabatons. Phase 4: Bloodsoaked Greaves. Phase 5: Avenger's Greaves, Boots of the Unwavering Will, Soulforge Boots.
Waist
Phase 1: Deathbone Girdle, Stalwart Clutch, Lightforge Belt. Phase 2: Unmelting Ice Girdle. Phase 3: Judgement Belt, Girdle of the Fallen Crusader. Phase 5: Royal Qiraji Belt, Triad Girdle, Soulforge Belt.
Neck
Phase 1: Medallion of Steadfast Might, Medallion of Grand Marshal Morris, Verek's Collar, Talisman of Evasion. Phase 2: Evil Eye Pendant. Phase 3: Master Dragonslayer's Medallion. Phase 4: Talisman of Protection. Phase 5: Mark of C'Thun, Pendant of the Qiraji Guardian. Phase 6: Gluth's Missing Collar.
Back
Phase 1: The Emperor's New Cape, Sergeant's Cape, Spritecaster Cape. Phase 2: Redoubt Cloak, Cloak of Warding, Shifting Cloak. Phase 3: Elementium Threaded Cloak. Phase 4: Overlord's Embrace. Phase 5: Sandstorm Cloak, Cloak of the Golden Hive. Phase 6: Cryptfiend Silk Cloak.
Rings
Phase 1: Naglering, Hardened Stone Band, Myrmidon's Signet, Magma Forged Band, Cyclopean Band. Phase 3: Archimtiros' Ring of Reckoning. Phase 4: Overlord's Onyx Band, Overlord's Crimson Band. Phase 5: Signet Ring of the Bronze Dragonflight, Angelista's Touch, Ring of Emperor Vek'lor. Phase 6: and of Resolution.
Trinkets & Relics
Trinkets Phase 1: Onyxia Blood Talisman, Essence of the Pure Flame, Mark of the Chosen, Force of Will, Mark of Tyranny, Shard of the Scale, Briarwood Reed, Smotts' Compass, Uther's Strength. Trinkets Phase 2: Vigilance Charm, Mindtap Talisman, Stormpike Insignia Rank 6. Trinkets Phase 3: Styleen's Impeding Scarab. Trinkets Phase 5: Zandalarian Hero Badge. Trinkets Phase 6: Glyph of Deflection. Relics Phase 5: Libram of Hope.
Consumables & Buffs
Restorative: Major Rejuvenation Potion, Major Healing Potion, Whipper Root Tuber for Defensive. Elixirs & Flasks: Flask of the Titans, Elixir of Superior Defense, Elixir of Fortitude, Elixir of Greater Agility, Greater Stoneshield Potion, Free Action Potion, Major Troll's Blood Potion for Defensive, and Flask of Supreme Power, Elixir of the Mongoose, Greater Arcane Elixir, Gift of Arthas for Offensive. Food: Dirge's Kickin' Chimaerok Chops, Monster Omelet, Tender Wolf Steak, Grilled Squid for Defensive, and Dragonbreath Chili for Offensive. Special: Lung Juice Cocktail, Spirit of Zanza for Defensive, and Goblin Sapper Charge, Dense Dynamite, Crystal Spire, Oil of Immolation for Offensive. World Buffs: Songflower Serenade, Mol'dar's Moxie, Sayge's Dark Fortune of Stamina, Spirit of Zandalar for Defensive, and Rallying Cry of the Dragonslayer, Sayge's Dark Fortune of Damage for Offensive. Temporary Weapon Enchants: Elemental Sharpening Stone, Frost Oil, Brilliant Wizard Oil for Offensive.

Levelling Up

First off, it is best that you hold back until you’re a level 20 Protection Paladin, and only then start to tank dungeons (if you have tanking experience). The reason is that you unlock Consecration at level 20, which is known for its excellent use of AoE threat generation. This class is the best dungeon tank in-game, due to the ability to easily cutting through levels by grinding the dungeon. Let’s have a look at the dungeons that are recommended for Protection Paladins to train from level 20 to 60.
The Deadmines (Levels 20-24): Even though it sounds scary, it is the first recommended dungeon for Protection Paladins to the tank. It isn’t difficult and it’s a very good place to cover some of the starting levels while gaining experience about how a dungeon works and how you should maintain threat.
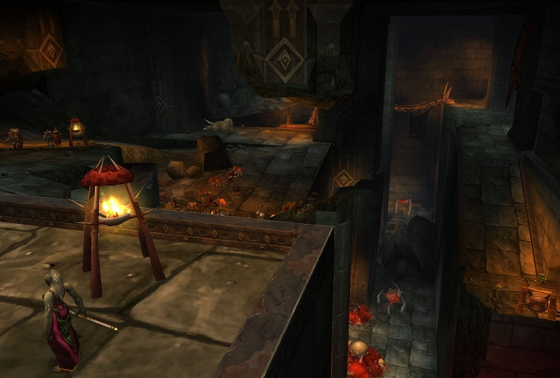
The Stockades (Levels 24-30): Another easy dungeon that you can camp with the help of Consecration and the surroundings itself (because the hallways are cramped). You can also choose to quest as an alternative because levelling up can get a little slow after reaching level 20.
Gnomergan (Levels 31-38): There aren’t many challenging mechanics or bosses in this dungeon, but it is quite fun because there are many good loots that you can obtain here.
Scarlet Monastery (Levels 32-44): A great area to level up due to the cramped surroundings and passageways. You can make the best use out of Line of Sight for large AoE pulls here, and who knows, you might make a friend or two during your excursion.
Zul’Farak Zombie Graveyard Runs (Levels 42-53): If you have a good spell-cleave group consisting of Mages and Warlocks, then you can easily gain 40-50k experience every hour. The zombies hit hard even with a good armour on, so make sure that you use a mage’s Blizzard on the kite addons to stay safe.
Blackrock Depths Prison (Levels 50-57): These arena runs are good for both; experience and loots, but you should be wary of the mobs because their mechanics are more dangerous than the other dungeon. While fighting the Fire Elementals, make sure to use the Fire Resistance aura as the hits can deal a lot of damage, and look out for mods with the Sunder Armour attack.
Lower Blackrock Spire Orc Runs (Levels 56-60): These runs can easily help you gain 60-90k experience every hour, depending upon your gameplay. You have to grind through the Orcs residing in the Lower Blackrock Spire until you reach the Ogre area and then reset. Also, make sure that you kill the Orc Warlocks first because they’re annoying and deadly at the same time.
Good luck!
![[WoW] Protection Warrior guide](https://d3p9x0g8yuku7f.cloudfront.net/media/thumbnails/thumbnails/Protwarrior.jpg.350x216_q90_detail_format-WEBP.webp)
![[Dragonflight] Death Knight Guide](https://d3p9x0g8yuku7f.cloudfront.net/media/thumbnails/thumbnails/HD-wallpaper-warcraft-world-of-warcraft-world-of-warcraft-dragonflight-thumbnail.jpg.350x216_q90_detail_format-WEBP.webp)
![[WoW] Hunter Leveling guide](https://d3p9x0g8yuku7f.cloudfront.net/media/thumbnails/thumbnails/main-qimg-d258e278f937424a3d382cb030d04f29-lq.png.350x216_q90_detail_format-WEBP.webp)
![[WoW] Feral Druid guide](https://d3p9x0g8yuku7f.cloudfront.net/media/thumbnails/thumbnails/DruidClassic.jpg.350x216_q90_detail_format-WEBP.webp)