Mekgineer Thermaplugg Boss Guide in Season of Discovery

Mekgineer Thermaplugg Boss Guide in Season of Discovery
Mekgineer Thermaplugg, the final boss in Gnomeregan, was once a promising tinker destined for the position of High Tinker. However, his ambitions were thwarted by his close friend High Tinker Mekkatorque, who was chosen instead. This betrayal led Thermaplugg down a dark path, turning him into the formidable adversary players face in this encounter.

Mekgineer Thermaplugg Abilities
The Mekgineer Thermaplugg encounter consists of four phases, each presenting unique challenges. The central mechanic throughout the fight is the activation of bombs on pillars, with corresponding effects based on the currently active boss. The three bosses players face before the final phase are [STX-96/FR], [STX-97/IC], and [STX-98/PO], each with their own set of abilities and challenges. In the fourth phase, [STX-99/XD] combines all previous abilities, adding an extra layer of complexity.
Activate Bombs Mechanic
Throughout the encounter, the boss can activate bombs on any of the six pillars. Players must be vigilant and interact with the red button on the right side of the corresponding pillar to prevent bombs from spawning. Each boss has a specific bomb associated with it:
- [STX-96/FR] (First Boss): Incendiary Bomb
- [STX-97/IC] (Second Boss): Frost Bomb
- [STX-98/PO] (Third Boss): Radioactive Bomb
To avoid bomb spawns, players should click the buttons, but a cooldown prevents the same player from activating the button twice in a row. Communication becomes crucial, especially in a more free-for-all strategy.
Boss-Specific Abilities:
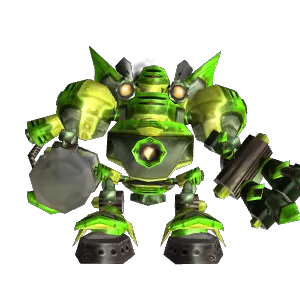
[STX-96/FR], the First Boss:
- Rocket Fire: A stacking damage-over-time (DOT) on the tank, requiring a tank swap to manage damage.
- Rocket Punch: Inflicts damage on the current target and applies Rocket Fire, eventually necessitating a tank swap.
- Oven Blast: A frontal fire breath spell, applying repeated stacks of the Rocket Fire debuff if hit.
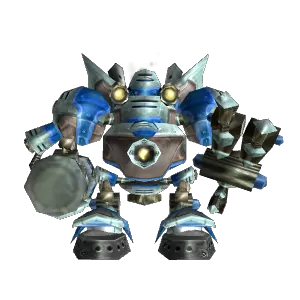
[STX-97/IC], the Second Boss:
- Superchilled Slam: Deals damage and applies Freezing, forcing a tank swap at 10 stacks.
- Coolant Discharge: A raid-wide AoE damage ability that applies Freezing. If a target is Completely Frozen, it results in a raid wipe.
- Freezing: A stacking slow debuff that eventually causes the target to become Completely Frozen. Dispellable.
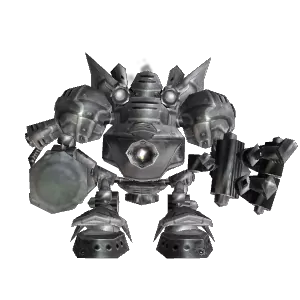
[STX-98/PO], the Third Boss:
- Radiation Sickness: Stacking debuff increasing nature damage taken by 50%.
- Dangerous Hammer: Inflicts damage and applies Radiation Sickness.
- Toxic Ventilation: Interruptible AoE channel dealing nature damage.
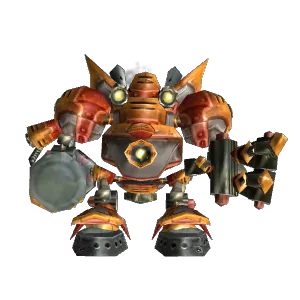
[STX-99/XD], the Fourth Boss (Final Phase):
- Inherits all abilities from the previous bosses, requiring players to adapt to a combination of fire, frost, and nature damage mechanics.
Mekgineer Thermaplugg Strategy
Preparation:
- Bring two tanks, as each phase has a forced tank swap mechanic.
- Consider having more than two healers for the initial clears due to intensive damage.
- Throughout the fight, six pillars will activate and spawn bombs based on the current phase.
- Click the red buttons on the pillars' right side to deactivate them and prevent bomb spawns.
Dealing with Pillars:
1. Ranged DPS/Healers Strategy:
- Assign at least 6 ranged players to different pillars.
- Be ready to react if their assigned pillar activates to minimize chaos.
2. Balanced/Melee-Heavy Strategy:
- Assign 2-4 ranged DPS to handle buttons.
- Position them centrally to react to any pillar activation.
- Ensure others focus on killing bombs with low HP.
Phase 1 - Fire Boss:
- Fire boss stacks Rocket Fire on the tank and raid.
- Tank should avoid Furnace surge by running away during the frontal.
- Between 5-7 stacks, off-tank taunts until the main tank's Rocket Fire expires.
- At 50% health, the phase ends, and the next phase begins.
Phase 2 - Frost Boss:
- Frost boss stacks Freezing on the raid and tank.
- Dispellable debuff; one tank can handle the boss throughout the phase.
- Keep tank and raid below 9 stacks to avoid raid wipe on 10th stack during coolant discharge.
- At 50% health, the phase ends, and the next phase begins.
Phase 3 - Nature Boss:
- Nature boss stacks Radiation dizziness on the raid and tank.
- Dispel or keep stacks low to avoid massive AoE damage during Toxic ventilation.
- Interrupt Toxic ventilation; lack of cast bar makes it challenging.
- At 50% health, the phase ends, and the next phase begins.
Phase 4 - [STX-99/XD]:
- [STX-99/XD] spawns and inherits all previous abilities.
- Individual mechanics become more manageable as all three stacks are present.
- Continue dealing with bombs and remember previous basic mechanics.
- Boss has half the health of previous phases; it dies at 0%.
Final Phase - [Mekgineer Thermaplugg]:
- [Mekgineer Thermaplugg] spawns, poses no significant threat.
- Focus on killing without any worries.
Mekgineer Thermaplugg Tips
Tips for Tanks:
- Position the fire boss near the entrance to avoid damaging others with Furnace surge.
- Tank the boss centrally during the fight for higher uptime, especially if players are assigned to specific pillars.
- Move out quickly if bombs explode near the center to minimize debuff stacks on melee.
Tips for Melee:
- Avoid floor pools left by exploding bombs to assist healers and maintain survivability.
- Aim for high uptime and act as backup for hitting pillar buttons.
- Use Poción de acción libre to avoid being slowed by Frost Bombs.
Tips for Ranged:
- Stay near assigned pillars for quick button clicks and minimal downtime.
- Clicking buttons costs health but provides mana; manage mana efficiently throughout the fight.
- Use instant cast spells to kill bombs before they explode, minimizing debuff stacks.
- Prioritize killing bombs before they reach melee or other ranged to maintain a clean boss arena.
Tips for Healers:
- Move out of the way of bombs if they approach you.
- "Snipe" button clicks to replenish mana efficiently during downtime.
- Utilize mana regeneration tools early and throughout the fight to manage mana effectively.
